Bunkers
The Bunker System project is inspired by GTA V Online and implemented in our own way on sa-mp. The bunker actually represents a new way to make money in the game, having both an active part where the player has to work alone or with friends, and a passive part where it sustains itself. In the lines below or here you will find more explanations.
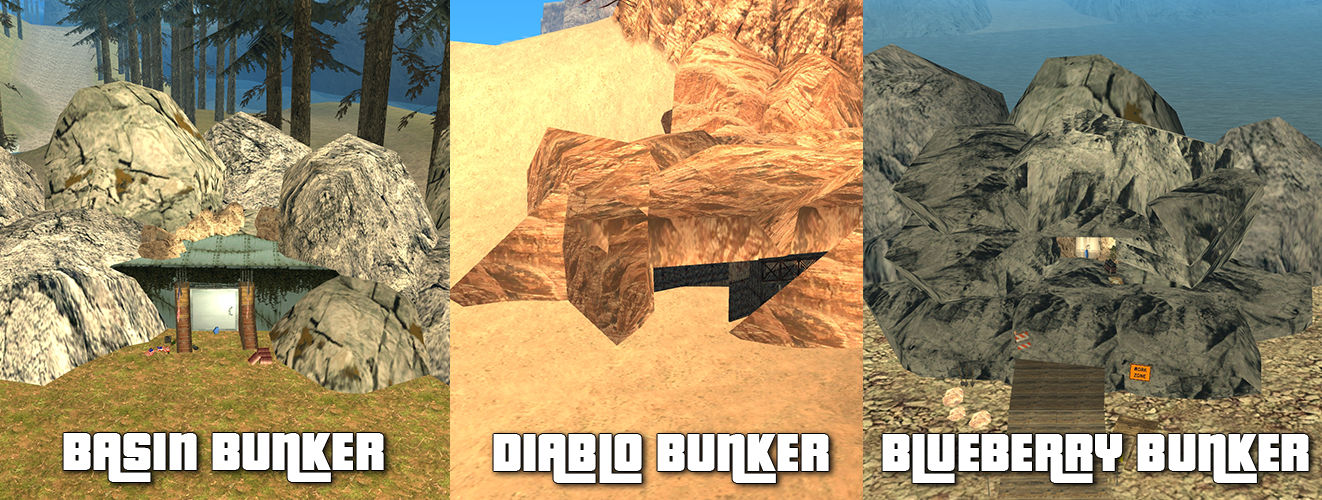
There are a total of three Bunkers (image #1) added that can be purchased starting at level 10, represented by a floppy disk on the map if you are near them:
Bunkers
Basin Bunker
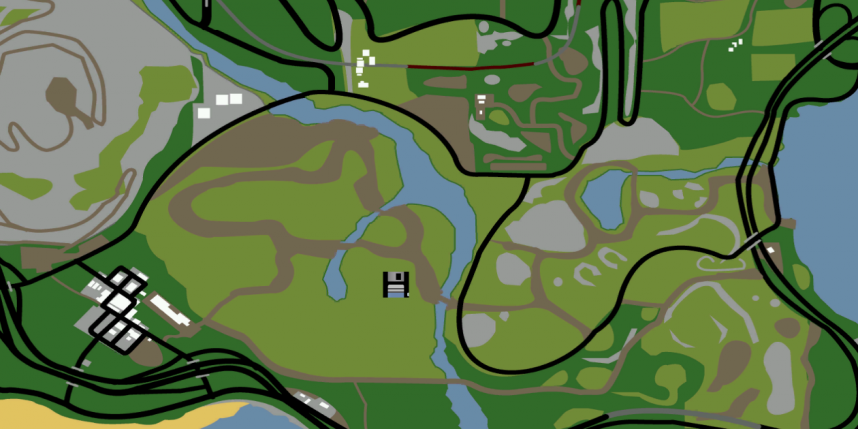
Basin Bunker is located near Shady Basin, close to Mount Chiliad (image #2) and is the cheapest of the three bunkers with a price of $1,000,000.
It has 4 types of upgrades with the following prices:
- Equipment worth $400,000.
- Staff worth $400,000.
- Security worth $200,000.
- Surveillance worth $2,400,000.
- Comfort worth $1,000,000.
The location of this bunker is not the greatest, hence the lowest price among all, but it is ideal for people who want to see how the bunker works and don't want to have too much expense from the start.
Diablo Bunker
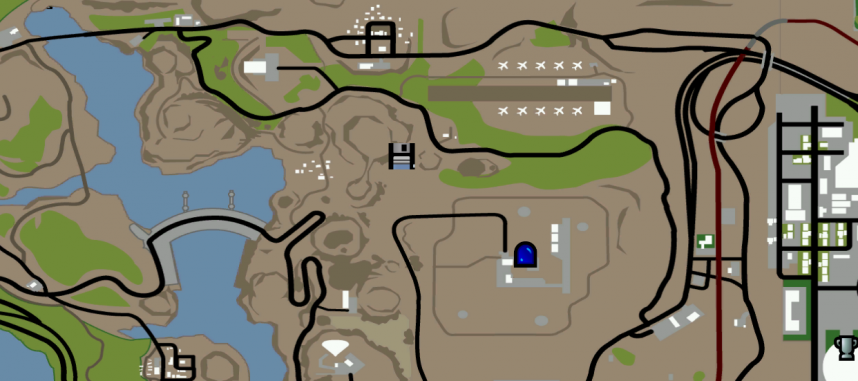
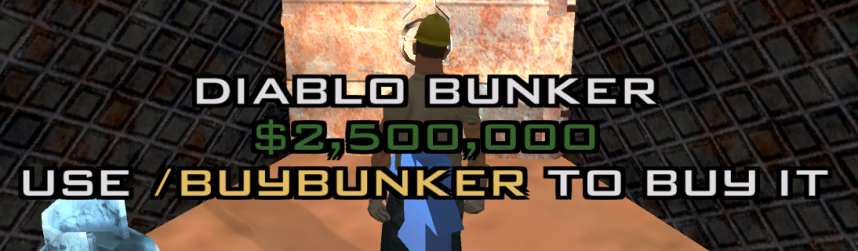
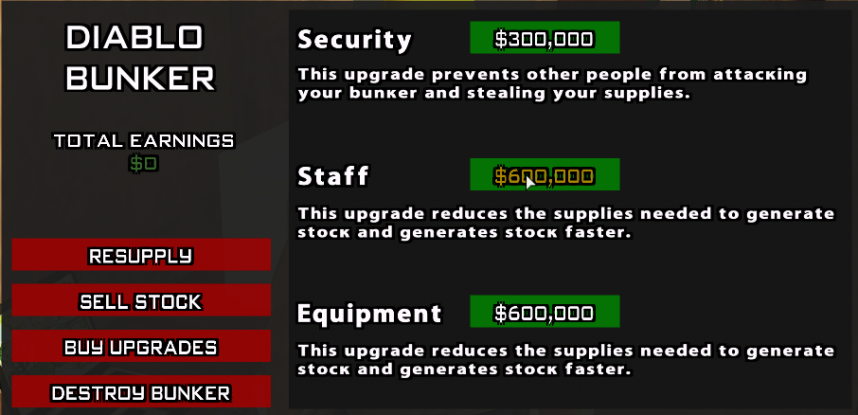
Diablo Bunker is located in the El Castillo Del Diablo area, near the National Guard HQ (image #3) and is the middle bunker with a price of $2,500,000.
It has 4 types of upgrades with the following prices:
- Equipment worth $600,000.
- Staff worth $600,000.
- Security worth $300,000.
- Surveillance worth $3,200,000.
- Comfort worth $1,500,000.
Its location is ideal, not quite the best, having relatively fast routes to most possible destinations.
Blueberry Bunker
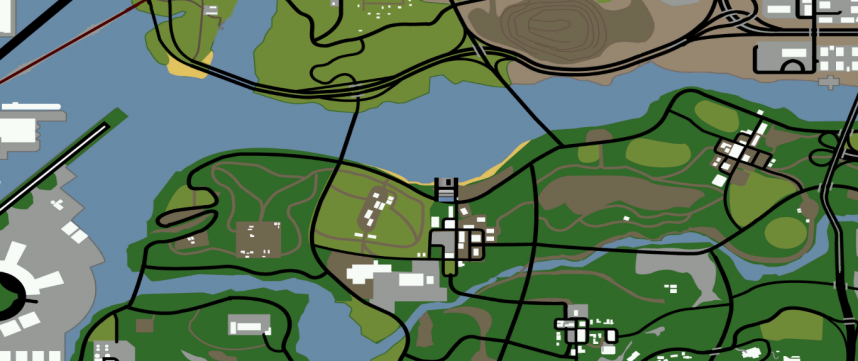
Blueberry Bunker is located near Blueberry town, close to Hitmen HQ (image #4) and is the most expensive of the three bunkers with a price of $3,500,000.
It has 4 types of upgrades with the following prices:
- Equipment worth $800,000.
- Staff worth $800,000.
- Security worth $400,000.
- Surveillance worth $4,000,000.
- Comfort worth $2,000,000.
Its location is in the center of the map, which makes it the perfect purchase for those looking for the most profitable Bunker.
General Characteristics
- Bunkers can be purchased starting at level 10. To buy one you must go to its location on the map and use the /buybunker command (image #5) if you have the necessary money in hand.
- Each player can buy a single Bunker per account. Multiple players can own a Bunker in the same location.
- The bunker is not transferable to other accounts and cannot be sold to other players. If you own a Bunker and want to buy a more expensive one, you will only pay the difference in money. Upgrades, supplies and stock from the old Bunker will be lost when you buy another Bunker.
- If you own a more expensive bunker and want to buy a cheaper bunker for various reasons, you will only be able to do this if you destroy the owned bunker.
- Only the owner can enter the Bunker, provided they don't have wanted. If they receive wanted while inside, they will be kicked out.
- Bunker missions cannot be started without holding the appropriate licenses.
Command Center
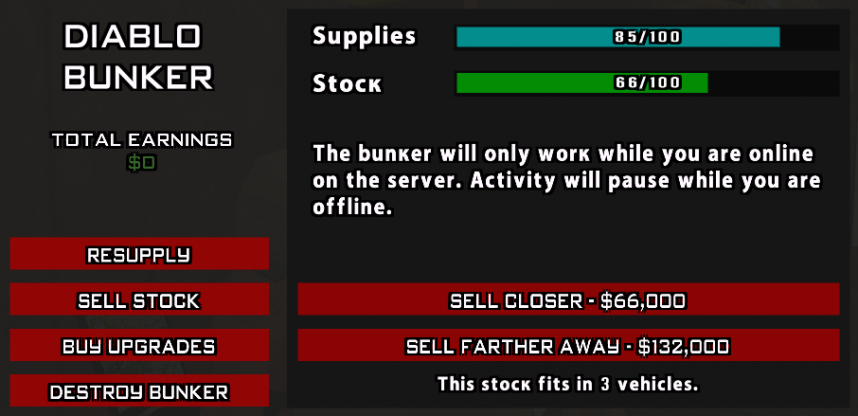
- The bunker can be managed from the command center (image #6) using the /bunker command. If you don't know where it is, type the command when you enter the Bunker and you will receive a checkpoint with the location.
- The command center allows you to check supplies, stock, total profit from Bunker, start supply missions, sale missions, buy upgrades or give up the Bunker.
Resupply and Supplies
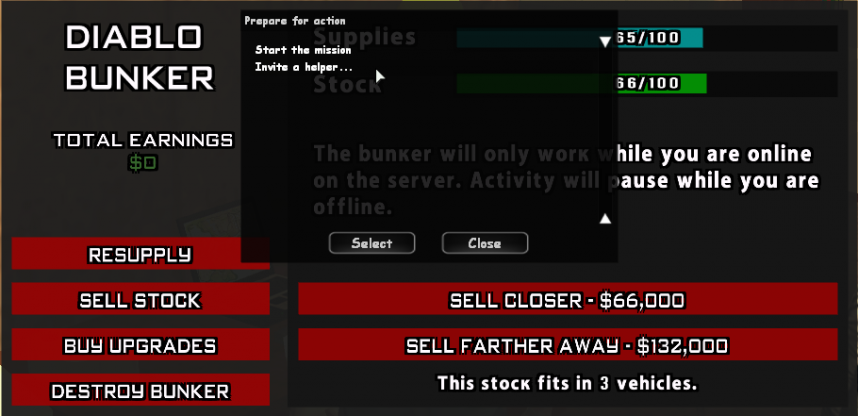
- The bunker needs supplies to function and produce stock. To gather supplies, access the Resupply button and you will see a dialog (image #7) from where you can start a supply mission as well as an option to invite helpers.
- A Bunker owner can invite up to 3 friends to help with resupply, thus resupplying the Bunker much faster.
- The maximum amount of supplies a Bunker can hold is 150 units.
- Supply missions cannot be started if the Bunker has at least 80 units of supplies.
- There are a total of 4 supply missions, being randomly determined by the server:
Note: Bunker missions can be canceled using the /cancel bunker command
Rob a Rival
- If there are Bunkers owned by other players and they don't have the Security upgrade, you can receive a mission to attack them and steal their supplies as long as they have at least 25 units of supplies.
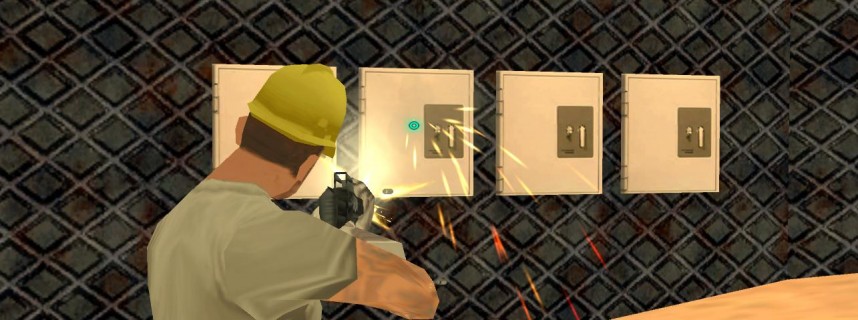
- If you receive such a mission, you must go to the Bunker marked on the map by a checkpoint and destroy the 4 safes (image #8). These are visible as in the image above and are found outside the Bunkers.
- To destroy them you must shoot them with a weapon until they disappear.
- The owners of the attacked Bunkers have the right to defend them.
- This mission will have an allocated time of 15 minutes. If it is not completed in the set time, the mission will fail and must be redone.
- If the mission is successful, the attacked Bunker will lose 25 units of supplies and the attacker will receive 25 units of supplies for each safe broken, so they can fill the Bunker's supplies from a single such mission.
Salvage Yard Job
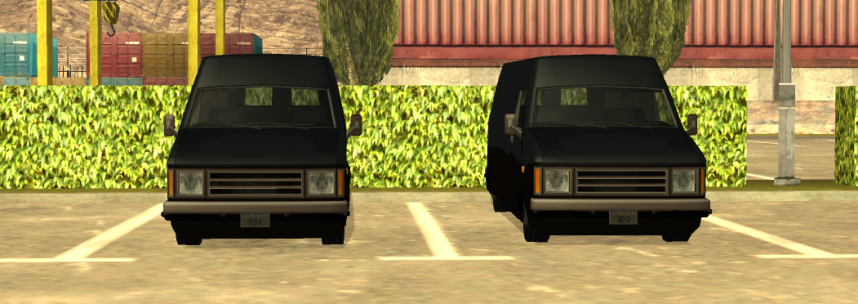
- Somewhere on the map, Rumpo type vehicles will be spawned that contain supplies and must be delivered to the Bunker (image #9).
- When you start a supply mission, don't forget to have a vehicle near the Bunker to have a means of transport to the destination.
- Each Rumpo delivered will increase the Bunker's supplies by 13 units, and in a mission each participant will receive 2 Rumpos to deliver in turn, so a total of 26 units of supplies per participant.
- If 4 players participate in a mission, the supplies will be filled from a single mission with 100 units of supplies. So for time efficiency, we recommend calling your friends to help, otherwise you will have to start more missions to fill the supplies.
- The time allocated to this mission is between 20 and 30 minutes depending on the owned Bunker.
Steal the Cargobob
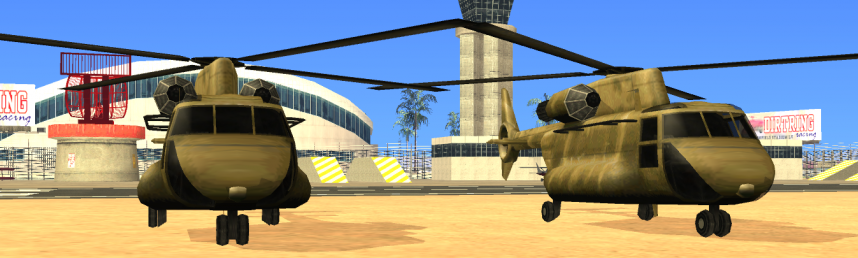
- Somewhere on the map, Cargobob type aircraft will be spawned that contain supplies and must be delivered to the Bunker (image #10).
- When you start a supply mission, don't forget to have a vehicle near the Bunker to have a means of transport to the destination.
- Each Cargobob delivered will increase the Bunker's supplies by 13 units, and in a mission each participant will receive 2 Cargobobs to deliver in turn, so a total of 26 units of supplies per participant.
- If 4 players participate in a mission, the supplies will be filled from a single mission with 100 units of supplies. So for time efficiency, we recommend calling your friends to help, otherwise you will have to start more missions to fill the supplies.
- The time allocated to this mission is between 20 and 30 minutes depending on the owned Bunker.
Get the Cash
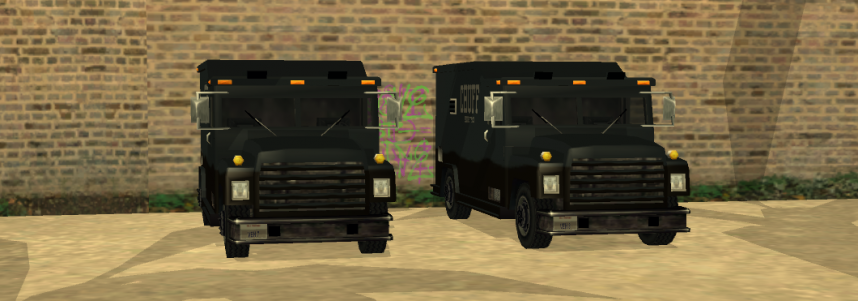
- Somewhere on the map, Securicar type vehicles will be spawned that contain supplies and must be delivered to the Bunker (image #11).
- When you start a supply mission, don't forget to have a vehicle near the Bunker to have a means of transport to the destination.
- Each Securicar delivered will increase the Bunker's supplies by 13 units, and in a mission each participant will receive 2 Securicars to deliver in turn, so a total of 26 units of supplies per participant.
- If 4 players participate in a mission, the supplies will be filled from a single mission with 100 units of supplies. So for time efficiency, we recommend calling your friends to help, otherwise you will have to start more missions to fill the supplies.
- The time allocated to this mission is between 20 and 30 minutes depending on the owned Bunker.
Bring the Boats
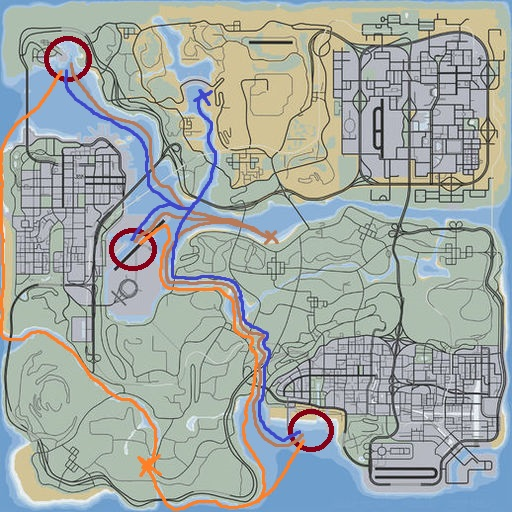
- Somewhere on the map, Launch type boats will be spawned that contain supplies and must be delivered to the Bunker.
- When you start a supply mission, don't forget to have a vehicle near the Bunker to have a means of transport to the destination.
- Each boat delivered will increase the Bunker's supplies by 13 units, and in a mission each participant will receive 2 boats to deliver in turn, so a total of 26 units of supplies per participant.
- If 4 players participate in a mission, the supplies will be filled from a single mission with 100 units of supplies. So for time efficiency, we recommend calling your friends to help, otherwise you will have to start more missions to fill the supplies.
- In image #12 you have the fastest routes for each bunker.
- The time allocated to this mission is between 20 and 30 minutes depending on the owned Bunker.
Barracks Supply Run
- This mission has a 15% chance to be generated when starting a resupply, available exclusively for the bunker owner (if they have helpers, only they can receive the mission).
- The goal is to capture a Barracks type military vehicle and deliver it to the bunker.
- The mission has two mandatory stages:
- Picklocking – Unlock the vehicle's lock by correctly positioning all pins (indicated in light green) using the W/A/S/D keys to move the tool and pins, respectively ENTER to lock the current pin. Colors indicate proximity to the correct position (yellow - green), and exceeding the correct position colors the pin red and resets the entire minigame.
- Hotwiring – After success from the first part of the mission, the player is forced as driver in the Barracks (F/ENTER) and must start the engine by connecting two wires between the pairs marked in yellow.
Note: Not solving any minigame in time leads to mission failure. Upon successful delivery of the Barracks, the bunker is instantly resupplied to maximum supply capacity, regardless of previous quantity.
Using Supplies
- For a Bunker to produce stock, it must have supplies.
- Bunkers with upgrades will consume supplies more slowly, so they will produce more stock over time and will need to be resupplied less often.
- These supplies are consumed over time, as follows:
- Bunker without any upgrades: 1 unit consumed in 100 seconds
- Bunker with staff or equipment upgrade: 1 unit consumed in 200 seconds
- Bunker with staff + equipment upgrade: 1 unit consumed in 300 seconds
- Given the figures above, a Bunker without any upgrades will need to be resupplied every 2-3 hours while a fully upgraded Bunker will need to be resupplied approximately every 8-9 hours.
Selling and Stock
- Stock can be sold starting with a minimum of 1 unit of stock.
- The price per unit of stock is $1,000 for selling to a nearby location or $2,000 for selling to a distant location.
- So if you have 100 units of stock you will receive $100,000 for nearby sale or $200,000 for distant sale.
- Depending on the stock held, you will have to deliver several Bandito type vehicles to the location marked on the map. It is recommended that if you sell stock that fits in more than 1 vehicle, you invite your friends to help, otherwise you will have to make multiple trips to sell the accumulated stock. More information can be found in image #13.
- Each helper on the sale mission will receive 10% of the final payment money, without decreasing the money received by the Bunker owner.
- The time allocated for stock sale is 5 minutes for nearby sale and 10 minutes for distant sale.
Stock
- For a Bunker to produce stock, it must have supplies.
- Stock will be produced only if the owner is online.
- Bunkers with upgrades will create stock faster, so they will produce more stock over time and will bring profit faster.
- Stock is created over time, as follows:
- Bunker without any upgrades: 1 unit created every 20 minutes
- Bunker with staff or equipment upgrade: 1 unit created every 15 minutes
- Bunker with staff + equipment upgrade: 1 unit created every 10 minutes
- Given the figures above, a Bunker without any upgrades will have maximum stock in approximately 33 hours while a fully upgraded Bunker will fill its stock in approximately 16 hours.
- From here, the prices for Bunkers and upgrades were also established, so that over time each of them will amortize their investment and produce only profit.
Upgrades
-
These make supply consumption, stock production or Bunker attack by rivals more efficient, as follows:
- Security: a Bunker with this upgrade cannot be attacked by rivals.
- Staff: a Bunker with this upgrade will consume supplies more slowly, so it will need to be resupplied less often, and will produce stock faster, so it will bring profit faster.
- Equipment: a Bunker with this upgrade will consume supplies more slowly, so it will need to be resupplied less often, and will produce stock faster, so it will bring profit faster.
- Surveillance: a Bunker with this upgrade will unlock the /mybunker command, with which you can check in real time:
- Supplies and stock in the bunker.
- The boost percentage of the bunker you own.
- The period when the boost will end.
- The source from which the bunker boost comes.
- Comfort: a Bunker with this upgrade (optional) will add interior facilities to the bunker. Once purchased, it offers:
- The possibility of healing inside it (on-duty PD members also receive armor).
- The possibility to use the /sleep command inside.
- The possibility to set the bunker as the main spawn location.
-
Note: Benefits apply exclusively to the bunker owner. Players who enter another bunker (e.g., hitmen through /ram) cannot access these functions.
- Upgrades are lost when changing or destroying the Bunker.
Destruction
- The Bunker destruction option present in the Command Center (image #14) will delete the owned Bunker from the account, without receiving anything in return.
- Upon destruction, everything related to the Bunker is lost (supplies, stock, upgrades, tier, etc.) and the action is irreversible.
Bunker Tiers
- From this moment, the bunker will have various levels called tiers, these levels can be unlocked at a certain amount of money generated through the bunker. These tiers will bring you different benefits as follows:
- Bunker Tier 0 - the level from which any bunker starts, this is automatically unlocked when purchasing the bunker, it offers a maximum capacity of 100 supplies and 100 stocks.
- Bunker Tier 1 - the level is unlocked when the bunker generates $20,000,000, this will offer you a maximum capacity of 110 supplies and 100 stocks.
- Bunker Tier 2 - the level is unlocked when the bunker generates $40,000,000, this will offer you a maximum capacity of 120 supplies and 100 stocks.
- Bunker Tier 3 - the level is unlocked when the bunker generates $60,000,000, this will offer you a maximum capacity of 130 supplies and 100 stocks.
- Bunker Tier 4 - the level is unlocked when the bunker generates $80,000,000, this will offer you a maximum capacity of 140 supplies and 100 stocks.
- Bunker Tier 5 - the level is unlocked when the bunker generates $100,000,000, this will offer you a maximum capacity of 150 supplies and 100 stocks.
- Bunker Tier 6 - the level is unlocked when the bunker generates $150,000,000, this will offer you a maximum capacity of 150 supplies and 110 stocks.
- Bunker Tier 7 - the level is unlocked when the bunker generates $175,000,000, this will offer you a maximum capacity of 150 supplies and 120 stocks.
- Bunker Tier 8 - the level is unlocked when the bunker generates $190,000,000, this will offer you a maximum capacity of 150 supplies and 130 stocks.
- Bunker Tier 9 - the level is unlocked when the bunker generates $220,000,000, this will offer you a maximum capacity of 150 supplies and 140 stocks.
- Bunker Tier 10 - the level is unlocked when the bunker generates $250,000,000, this will offer you a maximum capacity of 150 supplies and 150 stocks.
Notes: * If the bunker is destroyed, the tier will be reset, if you buy another bunker you will restart from tier 0. * The bunker tier is specified both through the /bunker command, but also through the /mybunker command, from a distance.