Trucker
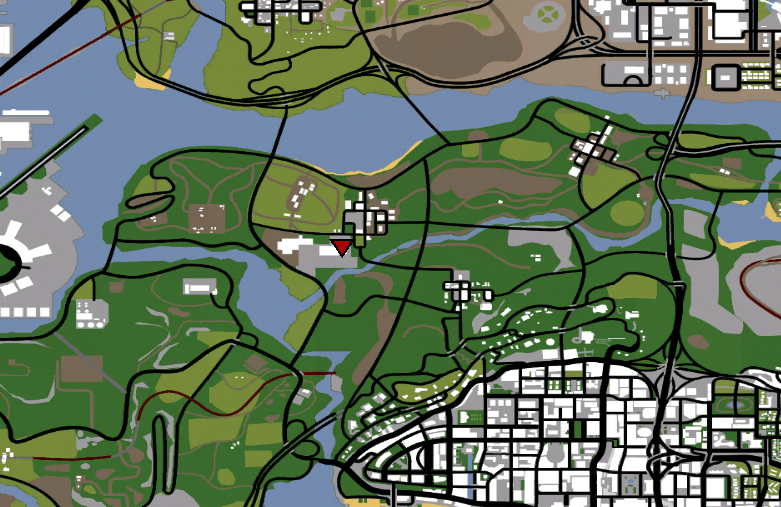
The base where all truckers load cargo into trailers is located between the three main cities, near the airport in San Fierro. This area is frequented by a large number of players, which makes it extremely crowded, even though the complex is quite large. Drive carefully inside the headquarters to avoid unwanted incidents. Continue reading this article, below you will find useful information about job earnings, skill advancement and other details.
General characteristics
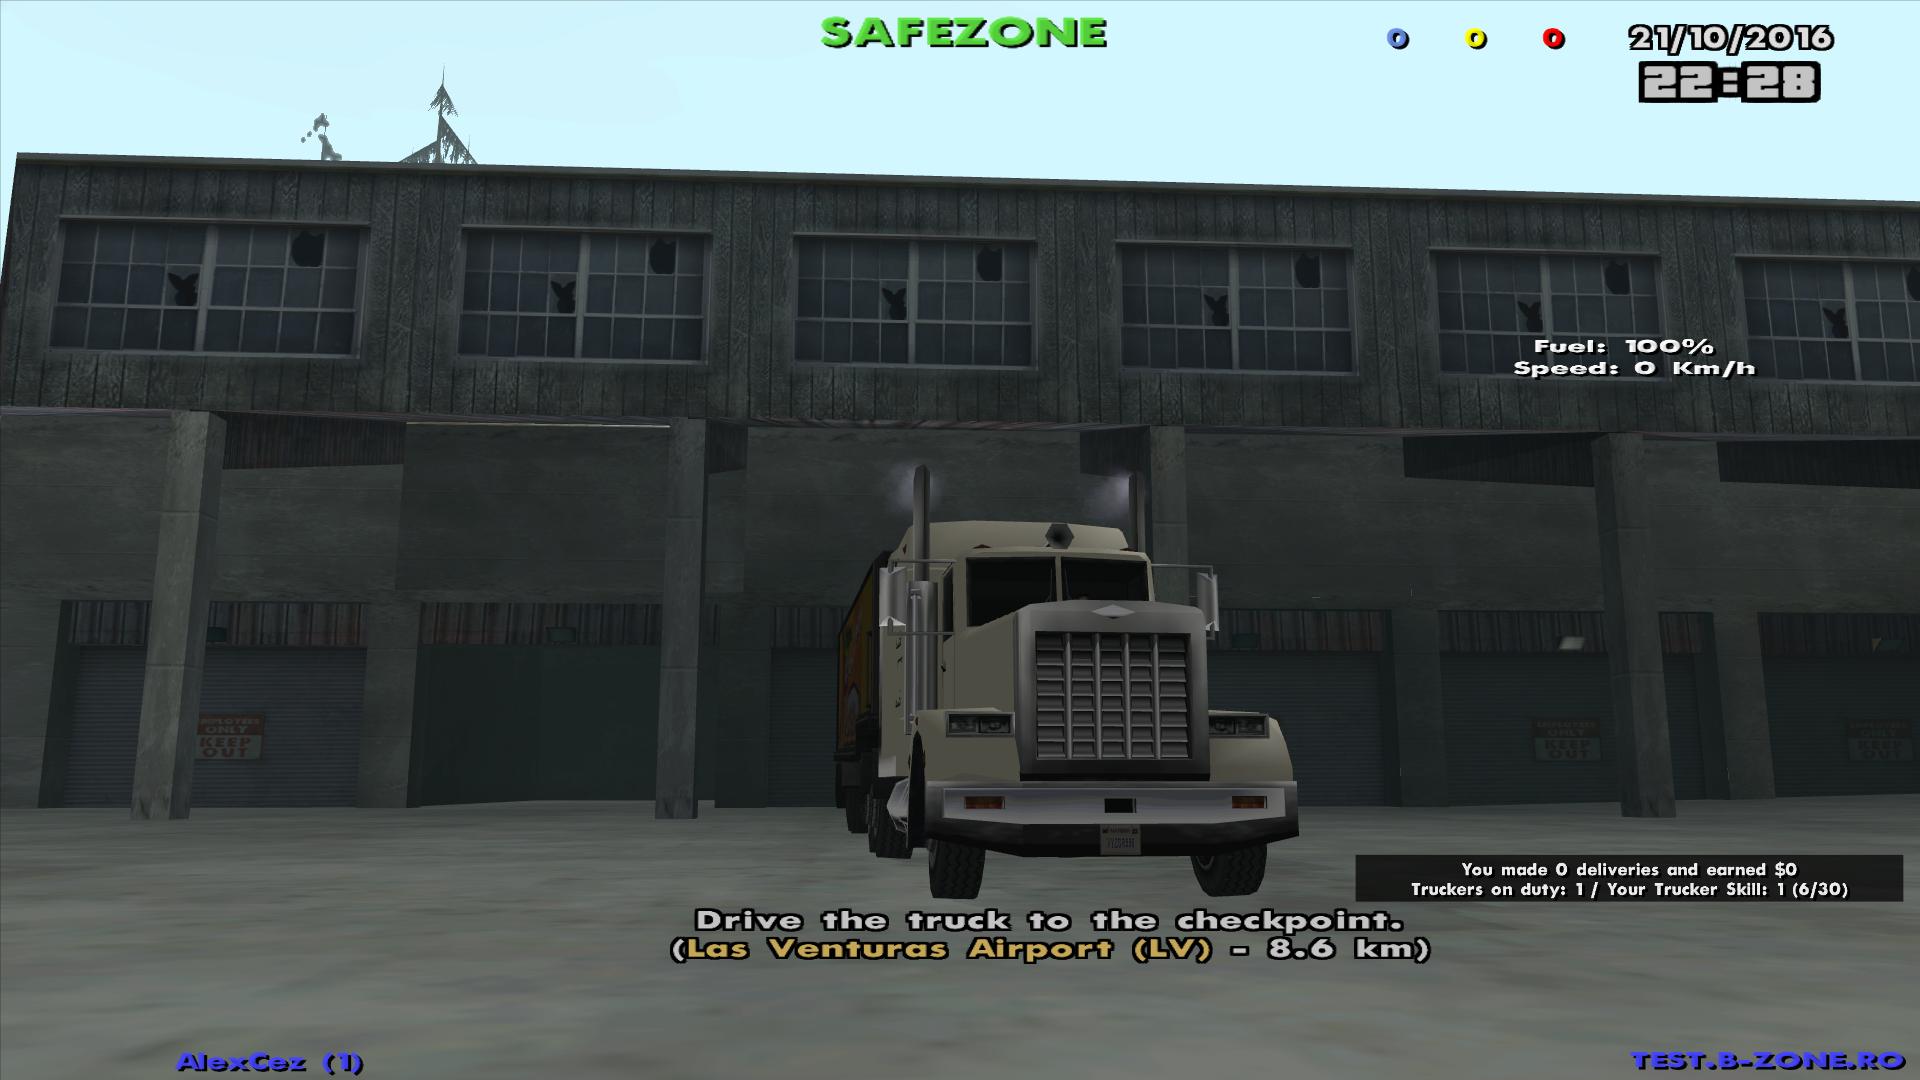
- Each player will receive a vehicle and a trailer when using the /work command.
- The truck will be locked during work and will not consume fuel.
- There is a limit of 50 players who can work simultaneously at the Trucker job.
- Drivers will have 15 minutes to get from one end of the route to the other. Otherwise, they will lose the mission.
- If you leave the vehicle, you have 20 seconds to get back in, otherwise you will lose the race.
- In the bottom right corner there is a box with information about the job.
Performing Transport
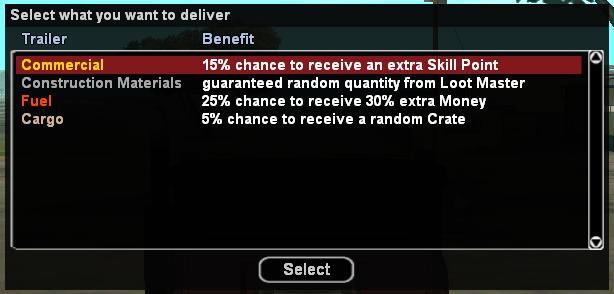
When selecting the desired route, you will be asked what you want to transport. There are 4 types of transport: Commercial, Construction Materials, Fuel and Cargo.
- Commercial - when performing a round trip transport of this type you have a 15% chance to receive from the company an extra skill point.
- This type of transport is unlocked starting with skill 1.
- Construction Materials - when performing a round trip transport of this type you are guaranteed to receive a quantity of materials for craftsman.
- You can receive between 20 - 40 Wood / Cotton / Gold Materials.
- You can receive between 40 - 60 Silver Materials.
- Maximum quantity is 999 materials. If this limit is reached, the respective material will no longer be received.
- This type of transport is unlocked starting with skill 4.
- Fuel - when performing a round trip transport of this type you have a 25% chance to receive from the company 30% more money on that route.
- This type of transport is unlocked starting with skill 7.
- Cargo - when performing a round trip transport of this type you have a 5% chance to receive from the company a random box.
- This type of transport is unlocked starting with skill 9.
Depending on the type of transport, the trailer will be different.
The trailer requires manual attachment from you, you will have to maneuver the truck until you couple the trailer, the trailer automatically couples when you enter its coupling.
The trailer will be marked with a yellow arrow, both on the map and above it to indicate which trailer you need to couple. If you are not near the trailer, a red dot will appear on the map instead of the yellow one.
- When any truck, whether personal or job-related, tries to couple another player's trailer, it will be frozen for 4 seconds and its position will be set at a safe distance from the trailer, to allow the legitimate player time to couple their trailer.
The delivery location will be marked with a red dot on the map and an orange colored area. The orange colored area represents the parking lot, where you can manually park the trailer. These parking lots are collision-free zones for all players.
Upon delivery, when you enter the orange zone (in the parking lot) a dialog will open offering you 2 parking options, automatic and manual parking.
- Automatic parking - automatic parking will automatically park the trailer, not offering a specific benefit like manual parking does.
- Manual parking - manual parking will assign you a random available parking spot in that parking lot, where you will have to maneuver the truck backwards.
- When the trailer is positioned in the right position you will receive an informative message to use the /detach command to uncouple the trailer.
- The benefit of this parking consists in offering an Extra Skill Point if the player has less than skill 10, otherwise this bonus will be converted into Extra 20% Money at the end of the race.
An informative message will be displayed when the trailer bonus is applied.
If multiple players try to park manually in the same parking lot and there are no more free parking spaces, the automatic parking option will be auto-selected.
- This aspect does not apply if the player is doing the job during the tutorial.
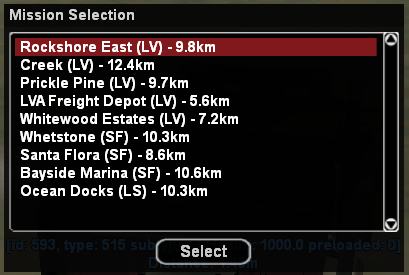
Earnings based on route for each skill
-
Rockshore East LV - 9.8 KM (3 parking spaces)
- Skill 1: $868 - Minimum round trip time 268 seconds.
- Skill 2: $883 - Minimum round trip time 268 seconds.
- Skill 3: $849 - Minimum round trip time 238 seconds.
- Skill 4: $958 - Minimum round trip time 238 seconds.
- Skill 5: $890 - Minimum round trip time 188 seconds.
- Skill 6: $924 - Minimum round trip time 188 seconds.
- Skill 7: $968 - Minimum round trip time 188 seconds.
- Skill 8: $1,002 - Minimum round trip time 188 seconds.
- Skill 9: $1,055 - Minimum round trip time 188 seconds.
- Skill 10: $1,096 - Minimum round trip time 188 seconds.
-
Creek LV - 12.4 KM (8 parking spaces)
- Skill 1: $1,062 - Minimum round trip time 328 seconds.
- Skill 2: $1,081 - Minimum round trip time 328 seconds.
- Skill 3: $1,141 - Minimum round trip time 320 seconds.
- Skill 4: $1,288 - Minimum round trip time 320 seconds.
- Skill 5: $1,316 - Minimum round trip time 278 seconds.
- Skill 6: $1,366 - Minimum round trip time 278 seconds.
- Skill 7: $1,431 - Minimum round trip time 278 seconds.
- Skill 8: $1,482 - Minimum round trip time 278 seconds.
- Skill 9: $1,561 - Minimum round trip time 278 seconds.
- Skill 10: $1,621 - Minimum round trip time 278 seconds.
-
Prickle Pine LV - 9.7 KM (11 parking spaces)
- Skill 1: $1,062 - Minimum round trip time XXX seconds.
- Skill 2: $1,081 - Minimum round trip time XXX seconds.
- Skill 3: $1,141 - Minimum round trip time XXX seconds.
- Skill 4: $1,288 - Minimum round trip time XXX seconds.
- Skill 5: $1,316 - Minimum round trip time XXX seconds.
- Skill 6: $1,366 - Minimum round trip time XXX seconds.
- Skill 7: $1,431 - Minimum round trip time XXX seconds.
- Skill 8: $1,482 - Minimum round trip time XXX seconds.
- Skill 9: $1,561 - Minimum round trip time XXX seconds.
- Skill 10: $1,621 - Minimum round trip time XXX seconds.
-
LVA Freight Depot LV - 5.6 KM (9 parking spaces)
- Skill 1: $1,062 - Minimum round trip time XXX seconds.
- Skill 2: $1,081 - Minimum round trip time XXX seconds.
- Skill 3: $1,141 - Minimum round trip time XXX seconds.
- Skill 4: $1,288 - Minimum round trip time XXX seconds.
- Skill 5: $1,316 - Minimum round trip time XXX seconds.
- Skill 6: $1,366 - Minimum round trip time XXX seconds.
- Skill 7: $1,431 - Minimum round trip time XXX seconds.
- Skill 8: $1,482 - Minimum round trip time XXX seconds.
- Skill 9: $1,561 - Minimum round trip time XXX seconds.
- Skill 10: $1,621 - Minimum round trip time XXX seconds.
-
Whitewood Estates LV - 7.2 KM (6 parking spaces)
- Skill 1: $1,062 - Minimum round trip time XXX seconds.
- Skill 2: $1,081 - Minimum round trip time XXX seconds.
- Skill 3: $1,141 - Minimum round trip time XXX seconds.
- Skill 4: $1,288 - Minimum round trip time XXX seconds.
- Skill 5: $1,316 - Minimum round trip time XXX seconds.
- Skill 6: $1,366 - Minimum round trip time XXX seconds.
- Skill 7: $1,431 - Minimum round trip time XXX seconds.
- Skill 8: $1,482 - Minimum round trip time XXX seconds.
- Skill 9: $1,561 - Minimum round trip time XXX seconds.
- Skill 10: $1,621 - Minimum round trip time XXX seconds.
-
Whetstone SF - 10.3 KM (5 parking spaces)
- Skill 1: $1,036 - Minimum round trip time 320 seconds.
- Skill 2: $1,055 - Minimum round trip time 320 seconds.
- Skill 3: $984 - Minimum round trip time 276 seconds.
- Skill 4: $1,111 - Minimum round trip time 276 seconds.
- Skill 5: $1,231 - Minimum round trip time 260 seconds.
- Skill 6: $1,278 - Minimum round trip time 260 seconds.
- Skill 7: $1,339 - Minimum round trip time 260 seconds.
- Skill 8: $1,386 - Minimum round trip time 260 seconds.
- Skill 9: $1,460 - Minimum round trip time 260 seconds.
- Skill 10: $1,516 - Minimum round trip time 260 seconds.
-
Santa Flora SF - 8.6 KM (7 parking spaces)
- Skill 1: $1,062 - Minimum round trip time XXX seconds.
- Skill 2: $1,081 - Minimum round trip time XXX seconds.
- Skill 3: $1,141 - Minimum round trip time XXX seconds.
- Skill 4: $1,288 - Minimum round trip time XXX seconds.
- Skill 5: $1,316 - Minimum round trip time XXX seconds.
- Skill 6: $1,366 - Minimum round trip time XXX seconds.
- Skill 7: $1,431 - Minimum round trip time XXX seconds.
- Skill 8: $1,482 - Minimum round trip time XXX seconds.
- Skill 9: $1,561 - Minimum round trip time XXX seconds.
- Skill 10: $1,621 - Minimum round trip time XXX seconds.
-
Bayside Marina SF - 10.6 KM (8 parking spaces)
- Skill 1: $1,237 - Minimum round trip time 354 seconds.
- Skill 2: $1,259 - Minimum round trip time 382 seconds.
- Skill 3: $1,212 - Minimum round trip time 340 seconds.
- Skill 4: $1,369 - Minimum round trip time 340 seconds.
- Skill 5: $1,429 - Minimum round trip time 302 seconds.
- Skill 6: $1,484 - Minimum round trip time 302 seconds.
- Skill 7: $1,555 - Minimum round trip time 302 seconds.
- Skill 8: $1,610 - Minimum round trip time 302 seconds.
- Skill 9: $1,696 - Minimum round trip time 302 seconds.
- Skill 10: $1,761 - Minimum round trip time 302 seconds.
-
Ocean Docks LS - 10.3 KM (9 parking spaces)
- Skill 1: $1,134 - Minimum round trip time 350 seconds.
- Skill 2: $1,153 - Minimum round trip time 350 seconds.
- Skill 3: $1,162 - Minimum round trip time 326 seconds.
- Skill 4: $1,312 - Minimum round trip time 326 seconds.
- Skill 5: $1,515 - Minimum round trip time 320 seconds.
- Skill 6: $1,573 - Minimum round trip time 320 seconds.
- Skill 7: $1,648 - Minimum round trip time 320 seconds.
- Skill 8: $1,706 - Minimum round trip time 320 seconds.
- Skill 9: $1,797 - Minimum round trip time 320 seconds.
- Skill 10: $1,866 - Minimum round trip time 320 seconds.
Please note:
The above payment is approximate and does not include premium account bonus or other bonuses active on the account.
Players with premium accounts receive 50% more of the job's base payment.
Routes required for skill advancement
- Skill 1 to Skill 2: 30 routes. (30 total)
- Skill 2 to Skill 3: 60 routes. (90 total)
- Skill 3 to Skill 4: 120 routes. (210 total)
- Skill 4 to Skill 5: 240 routes. (450 total)
- Skill 5 to Skill 6: 200 routes. (650 total)
- Skill 6 to Skill 7: 250 routes. (900 total)
- Skill 7 to Skill 8: 300 routes. (1200 total)
- Skill 8 to Skill 9: 350 routes. (1550 total)
- Skill 9 to Skill 10: 350 routes. (1900 total)
Note: A route represents completing the round trip.
Vehicles based on skill
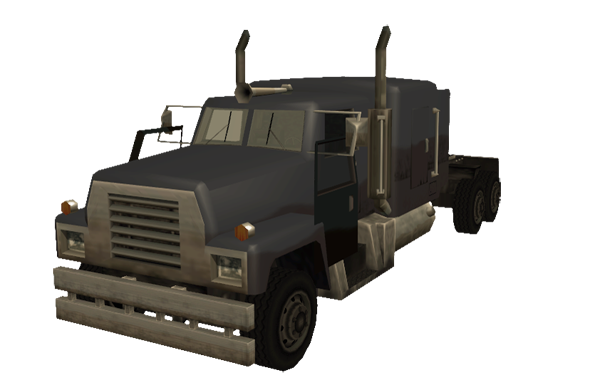
Linerunner

- Maximum speed: 110 KM/h
- Based on: Kenworth W900L
- Number of seats: 2
- Required skill: 1, 2
- Tunable: TransFender
Tanker
- Maximum speed: 120 KM/h
- Based on: International Paystar
- Number of seats: 2
- Required skill: 3, 4
- Tunable: TransFender
Roadtrain
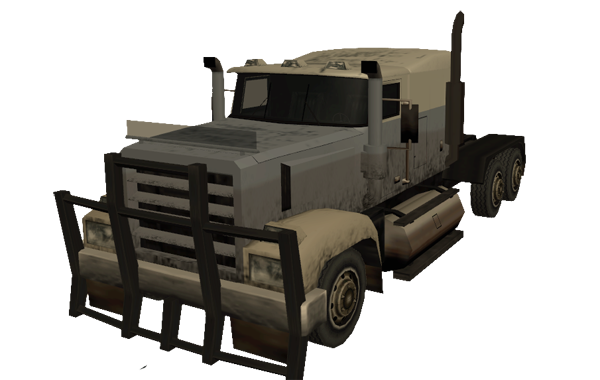
- Maximum speed: 142 KM/h
- Based on: 4964 Heritage
- Number of seats: 2
- Required skill: 5, 6, 7, 8, 9, 10
- Tunable: TransFender
Note: The speeds are the same whether the truck has a trailer or not.
Specific commands
/work
Using this command, the server will offer you the appropriate vehicle (and a trailer), depending on your skill to start work. If you are not close enough to the location set as the mission starting point, the server will guide you to this area by fixing a red dot on your radar.
/detach
Using this command, the server detaches the current trailer you have attached to the truck. The command works even if the truck and trailer are personal.